A robot is an electromechanical device programmed to make decisions and act without manual intervention. From professional and service robots to domestic robots, there is a wide range of devices available. With access to robotic kits and advice from robotic experts, it makes sense that more people are wondering how to build their own robots.
Readers are invited to follow this guide and get involved in building their own robot step by step.
If you don’t have previous robot-building experience but want to learn the basics of how to construct your own robot from scratch, start with a simple robot. By the end of this article, readers will be ready to begin the process of building a robot.
Why You Should Build Your Own Robot
The robotics industry has a bright future. According to a 2025 report from the International Federation of Robotics, “The global market value of industrial robot installations has reached an all-time high of US$16.5 billion.”1 Robots are everywhere, from self-driving cars to automatic vacuum cleaners, and they help people accomplish a variety of tasks—both mundane and grandiose. Building your own robot allows you to experience the industry that will likely continue to dominate many aspects of life.
Aside from opening a world of opportunity, dabbling in basic robotics can also expand your skill set. It lets you improve critical thinking and creativity, encouraging you to explore your imagination and develop innovative solutions. These skills, along with the confidence gained from building robots, can positively impact various aspects of children’s and adults’ lives. Even a basic robot for kids can be exciting, as the robotics field is designed to challenge the mind.
How Hard Is It to Build Your Own Robot?
Creating a robot is an interdisciplinary project that involves various challenges, including the complexities of designing, building, and customizing robots to provide an engaging and advanced hands-on learning experience for children. Even a basic robot for kids requires mechanical assembly and very basic programming skills. Despite these challenges, building a robot is possible for anyone with enough motivation and willingness to learn.
How Long Does It Take to Build a Robot?
In robotics, build time can vary widely. Complex robots can take several years to build, while a simple one can be built in a couple of hours. It also depends on your level of programming experience or mechanical and electrical assembly expertise.
Success in building a robot is measured not just by how quickly it is built, but by the learning and achievements gained throughout the process.
How Much Does It Cost to Build Your Own Robot?
The cost of making your own custom robot heavily depends on its complexity. Basic DIY Robots with basic building pieces can have a total cost ranging from $50 to hundreds of dollars. Bigger ones, like professional, service, or industrial robots, can cost up to a hundred thousand dollars.
Investing in quality components may increase the overall cost, but it also ensures greater reliability and performance for your robot.
How Much Cheaper Is It to Build Your Own Robot?
If you’re building a simple robot, you can expect to spend about $20.2 The bigger and more complex your robot is, the more it will cost and the more money you’ll save by building it yourself. However, it’s important to keep in mind that the cost primarily depends on the complexity of the robot.
What Do You Need to Build Your Own Robot?
Building a robot requires a varying number of components and versatile pieces. Building an electromechanical device may require an instruction booklet, but you don’t have to be an electrical engineer to build one. To make things easier for you, we’ve listed the components and tools you will need to make your DIY robot.
- Actuators and Sensors: There are different types of sensors that help the robot receive input from the outside world. For example, a distance sensor acts as the eyes and helps the robot discern data about how far something is. Actuators are the “muscles” of the robot that use this data to react and move appropriately. Common actuators include a motor or a DC motor, which are essential for creating movement and vibrations in your robot.
- The Processing Unit: The microcontroller is the processing unit, also referred to as the brain of the robot. It handles data from the sensors and gives commands to the rest of the robot to react appropriately. Arduino and Raspberry Pi microcontrollers are two of the most common controllers for simple DIY robots.
- Batteries: If the processing unit is the brain, the battery is the heart. Your battery should have enough energy to power up all the components like the sensors, actuators, and microcontrollers. A rechargeable battery is better than a disposable one. The disposable battery costs more over time and uses up natural minerals.
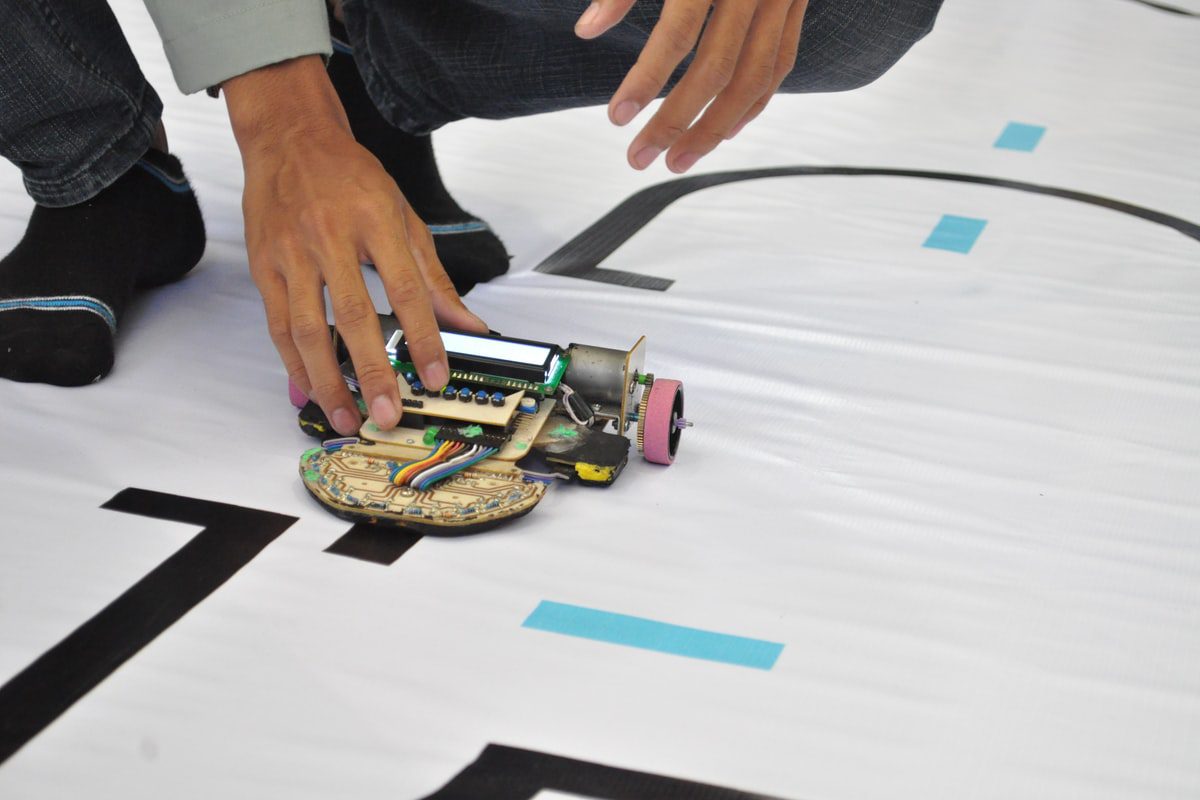
- Robot Chassis: The robot chassis is where you mount all the parts; it is the body of the robot. You can either buy a chassis for your robot or custom-make one. The robot chassis should be durable enough to handle its weight and spacious enough to accommodate the parts. During assembly, you may need to insert components such as motors or batteries into the chassis to ensure a secure fit.
- Mechanical and Electrical Tools: In the whole process of assembling components, you will need various tools. At the very least, you will need screwdrivers, pliers, and a breadboard for prototyping. Essential electrical components include a switch for controlling power and a circuit to connect all electronic parts. Establishing a secure connection between wires, LEDs, motors, and power supplies is crucial for reliable operation. Hot glue is often used to assemble and secure parts like the battery, motors, and utensils to the frame, providing stability during project assembly. The other tools you need will depend on the components you choose for your robot.
Building Your Robot From Scratch: A Step-by-Step Guide
Even though robotics projects are fun, it can be intimidating to start your first one. It’s actually not that difficult as long as you have the right tools and motivation. In planning your robot, building instructions are helpful when making a list of what you need to start. The following steps will guide you to construct your own robot, making the process accessible even for beginners. This guide covers different types of builds, from simple to more complex robots.
Step 1. Plan Your Robot’s Purpose and Design
Robot designs and purposes are just as important as mechanical parts. Without having a clear goal for what you want your robot to achieve, you won’t know where to start. You should focus on the key features and functions you want your robot to have. Your end goal is essential in order to know which processor, sensors, and actuators will do the job.
Step 2. Choose Your Microcontroller
Once you’ve thought about the purpose and design of your robot, you must choose your processor and brain. An Arduino or Raspberry Pi is usually enough to cover simple robot processes, but feel free to explore other options. Python is a popular and beginner-friendly programming language for programming microcontrollers in robotics, making it easy to develop movement, object detection, and automation features. Choose a microcontroller or microprocessor best suited to your goals and what you want your robot to achieve.
Step 3. Gather Actuators, Sensors, and Batteries
Think about whether your robot needs a color sensor, a distance sensor, or an infrared sensor. Perhaps it needs all three or something entirely different? Some robots require sensors specifically to detect or interact with objects in their environment, enabling them to perceive and respond to various items using technologies like computer vision. Ensure you get the appropriate sensors, motors, and power source ready for your robot.
Step 4. Assemble and Connect the Parts to the Processor
Do the necessary wiring to connect the processor, sensors, and actuators. Simple robots, at this level, usually only use simple DC motors, servo motors, or stepper motors. Any processor you use should have no problem managing these actuators and connecting them to sensors.
Step 5. Connect the Processor to Your Computer and Install the Necessary Software
Now that all the robot parts are connected, it’s time to plug your microcontroller into your computer. Install the needed software for your microcontroller, such as an Arduino IDE if you’ve used an Arduino board. There are usually detailed instructions on your microcontroller website for this step. With the software installed, you can use software controls to program the movement and behavior of your robot, enabling features like motor movement and sensor integration.
Step 6. Test Your Prototype
The breadboard comes in as the programming stage begins. Test the various sensors and motors of the robot using the breadboard and run the necessary code. Figure out if everything is working properly and whether you need to add parts like extra sensors.
Step 7. Mount All Parts of the Robot Together on the Chassis
If everything is functioning properly, carefully mount it all up on your chassis. You can usually buy a good robot chassis for a reasonable price, but you can also build one yourself. If you purchased a robot-building kit, it should come with a chassis.
Step 8. Complete the Final Testing Phase
Test the robot again to see how the chassis holds up with the sensors and parts. Ensure your actuators, such as DC motors, servo motors, or stepper motors, hold up with the chassis. Test your robot on different surfaces, such as wooden tables, tiles, or the floor, to ensure it operates effectively in various environments.
Step 9. Finalize the Robot
At this point, you should have what looks like a finished robot. This step is where you make final adjustments, whether aesthetic or function-related. You can also enhance your robot’s appearance or functionality by adding extra features or decorations to make it more engaging and personalized. With this done, you have successfully finished building your very own custom robot.
Step 10. Be Open to Further Changes
Although your robot is now complete and finalized, be open to making any adjustments for improvement. You may find that you need extra sensors or that the power consumption is too high. Be open to adjustments and opportunities to experiment and extend your knowledge.
Don’t forget to review all steps and ensure all parts are securely assembled before considering the robot complete.
Do You Need Coding Skills to Create a Robot?
Yes, you need coding skills to create a robot. To create even a simple, tiny robot, you’ll need to have a basic understanding of coding, but you don’t have to be a pro. Technically, you could copy and paste code from the internet, but that isn’t always compatible with the robot parts you assemble. Taking coding lessons can help you build foundational programming skills that are essential for working with robotics.
Can You Learn to Build a Robot in a Coding Bootcamp?
Yes, you can learn the necessary programming skills for robotics in a coding bootcamp. However, a coding bootcamp would most likely not cover the mechanical and electrical assembly processes on how to build your own robot. Still, a way to learn robotics in a programming environment like a coding bootcamp will be beneficial to your robotics journey.
Gather Feedback, Reflect, and Iterate
Learning how to build your own robot could take you in many directions. If this was your first robot, then you’ve probably gained a lot of new skills. If you decide to develop them, you’ll be able to find better strategies that suit your strengths and weaknesses. You might even consider a short course or training program.

"Career Karma entered my life when I needed it most and quickly helped me match with a bootcamp. Two months after graduating, I found my dream job that aligned with my values and goals in life!"
Venus, Software Engineer at Rockbot
Dabbling further into robotics will help to train the engineering side of your mind. Getting a friend to assist you in your robot-making journey will also help, especially if your friend has robot-making experience. Building robots with friends can make the process more engaging and enjoyable, turning it into a fun, collaborative experience. Research to gain a better understanding, repeat processes, and reflect on where you could improve.
How to Build Your Own Robot FAQ
No. If you are only making basic hobby robots, the most you’ll need is space as well as basic tools and materials. Workshops are for complex and industrial-grade robots. Still, even with complex personal robots, you won’t need machines like laser cutters or related equipment anytime soon.
Programming is a pretty challenging skill, but it is one that anyone can learn if they really want to. Start with beginner-friendly robot projects before advancing to a more complex robot.
Your robot should be able to do whatever you programmed it to do. The functions are entirely up to you. There are bootcamps, online courses, free YouTube tutorials, blogs, and STEM kits with instructions that can guide you through the process. Start with easy projects before pursuing a difficult robotics project. You can participate in robotics competitions to showcase your creations and see how your robot compares to other robots in terms of design and functionality. Many events also allow you to share or display your creations to a wider audience.
Children ages six to seven can start with basic robot kits. You have many choices, including remote-control robots, solar robots, cute robots, paper robots, sandwich-shaped robots, and more advanced robots. As long as you are willing to learn, you can start building your own robot at any age.
Sources:
1 https://ifr.org/ifr-press-releases/news/top-5-global-robotics-trends-2025
About us: Career Karma is a platform designed to help job seekers find, research, and connect with job training programs to advance their careers. Learn about the CK publication.