Building animations is a breeze with CSS. And the fun part is that you don’t need any third party frameworks or plugins.
The @keyframes CSS rule is a tool we need under our belt to build these animations.
@keyframes Syntax
The @keyframes is a CSS at-rule. At-rules tells how CSS should behave. There are many other at-rules such as @viewport, @supports among others.
We define a @keyframes rule with the following syntax.
@keyframes <name> {
    from {
    /* start details here */
    }

    to {
    /* end details here */
    }
}
We can get more refined animation declarations by specifying percentages instead of keywords.
@keyframes <name> {
  0% { }
  50% { }
  100% { }
}
Note: In order to use our newly created keyframe we need to add it as a value of the animation-name property. We could also set the animation-duration to specify the duration of our declared @keyframes animation.
Magic Ball Example
Let’s go ahead and make a magic ball appear and disappear. Please refer to the accompanying Codepen if you get lost at any point.
The first thing we need to do is define our animation. We’ll name it magic-ball:
@keyframes magic-ball {
  from {
    background-color: limegreen;
  }
  to {
    background-color: blueviolet;
  }
}
Here basically we are changing the background color from limegreen to blueviolet. This can be applied to any element, but we’ll go ahead and apply it to a circle.
.circle {
  width: 10rem;
  height: 10rem;
  border-radius: 50%;
  animation-name: magic-ball;
  animation-duration: 4s;
}
Do not forget that in order for our keyframe animation to work we need to add it as a value of the animation-name property and set an animation duration in seconds by using animation-duration.
With this animation, now our ball is appearing and disappearing!💥

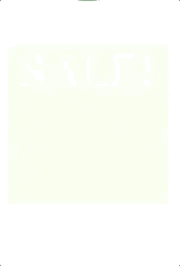
Flash Sale Example
Let’s go ahead and create another animation. This time we’ll animate a square and create a moving effect. We will name our animation moveIn and in this case we’ll use percentages.
@keyframes moveIn {
  0% {
    opacity: 0;
    transform: translateY(3rem);
  }
  100% {
    opacity: 1;
    transform: translate(0);
  }
}
Opacity is pretty much our transparency. So we can apply this newly created animation to our square
.square {
  width: 10rem;
  height: 10rem;
  background-color: greenyellow;
  animation-name: moveIn;
  animation-duration: 4s;
}
You can see how with very little we have accomplished a fine effect!
Conclusion
You can continue your journey on animations by reading the CSS documentation on animations. Also note, we only referred to one way to refine our animations by using its duration. There are many more animation sub-properties worth looking at!
Finally, do have in mind that not all properties can be animated. Look at this exhaustive list of animated properties.
About us: Career Karma is a platform designed to help job seekers find, research, and connect with job training programs to advance their careers. Learn about the CK publication.