jQuery: A Brief Introduction
jQuery is a JavaScript library that allows developers to manipulate the DOM, write event handlers, animations, and AJAX requests with just a few lines of code. This is possible with selectors and methods unique to the jQuery API. One of these methods is append().
What is jQuery append()?
The append() method is able to take one or multiple arguments of “content” (which can be an HTML string, text, an array, an element, or more jQuery), and attach or “append” it to the end of any or all elements matching the selector. Some common uses include adding an item to the end of a list (such as a new “to do” item in a to do list), or displaying new content at the click of a button. Now let’s take a look at how append() works with some example code.
How to Use jQuery append()
Taking the above example of inserting items into a to do list, we will see how append() is called on a selector and inserts the content to all of the matching selections.
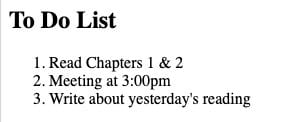
Starting with our HTML that builds a basic to do list:
<!DOCTYPE html>
<html>
<head>
<script src="https://ajax.googleapis.com/ajax/libs/jquery/3.5.1/jquery.min.js"></script>
</head>
<body>
<h2>To Do List</h2>
<ol class="list1">
<li>Read Chapters 1 & 2 </li>
<li>Meeting at 3:00pm</li>
<li>Write about yesterday's reading</li>
</ol>
</body>
</html>
It’s important to note to include an address to the jQuery API inside a <script> tag in the <head> of the HTML page. Otherwise, we don’t get to use jQuery in our HTML page.
Now, our to do list renders beautifully!
We are feeling productive today, so let’s add an item to the end of the list. What about dinner plans?
Referencing our HTML layout, we see the ordered list (<ol>) has a class of list1. This is great news because we can select that entire selection by adding another <script> tag to the bottom of the <body>:
<script>
 $(document).ready( () => {
   $(".list1").append("<li>Make dinner plans</li>")
 })
</script>
Inside of the <script> tag, we have some $ symbols. What are these? These are the powerful jQuery selectors.
We can select anything in our DOM by passing in an element, class name, or id name to name a few. In this case, we have selected anything with a class of list1, which will select the entire <ol> element. The above (document) selector selects the entire page and calls the ready() method to wait to call the next line of code until the page has fully loaded. This helps to keep our code running sequentially.
Now, inside of our ready() callback function, we have selected all elements with a class of list1. In this case, this will select our <ol> and insert the <li> passed to append() just above our closing </ol>. So, after our page loads, the Make dinner plans list item will be appended to our to do list:

Fantastic! Now let’s take a look at another example. This time let’s display more content once a button is clicked.
jQuery append(): A Real-World Example
Suppose we have a button on our web page and we want to display new content when the button is clicked. It would be efficient and more gratifying for our users if we displayed the new content without a page refresh or redirect.
Herein lies the power and elegance of jQuery: we can display new content without a refresh or redirect when the button is clicked.
Given this base HTML:
<!DOCTYPE html>
<html>
<head>
<script src="https://ajax.googleapis.com/ajax/libs/jquery/3.5.1/jquery.min.js"></script>
</head>
<body>
<div class="content">
  <p>Hello World!</p>
</div>
<button id="btn-main">Click Me!</button>
</body>
</html>
Pretty similar to how we started our to do list except we have a button:

Let’s use what we’ve learned about jQuery to append more content under “Hello World!” once the button is clicked.
<script>
  $(document).ready( () => {
    $("#main-btn").click( () => {
      $("p").append("<b>Goodbye</b>")
    })
  })
</script>
Once again, we have included a <script> tag at the end of our <body>. Like our to do list example, we are waiting for the document to finish loading before doing anything else.
Once the document is loaded, we are now able to click the button and call the click() method on our button. Now our <p> tag is selected and we call the append() method with the argument content of the HTML string ” <b>Goodbye</b>." This will insert the word Goodbye in bold at the end of the <p> tag.
Our final output will look like this:
<div class="content">
 <p>Hello World.</p><b>Goodbye</b>.
</div>

<button id="btn-main">Click Me</button>
And on screen like this:

Or if we wanted to append Goodbye to the end of the <div>, we just change the <p> selector to the class content:
<script>
  $(document).ready( () => {
    $("#main-btn").click( () => {
      $(".content").append("<b>Goodbye</b>")
    })
  })
</script>
Which displays as:

Conclusion
In summary, we have seen how the append() method works on its own and in the context of a series of callback functions.
By simply including the jQuery selectors and methods inside of a <script> tag, we are able to append different types of content to the end of any elements that match our jQuery selector. The append() method opens a world of possibilities to display content to the user at specific times without a redirect or refresh.
About us: Career Karma is a platform designed to help job seekers find, research, and connect with job training programs to advance their careers. Learn about the CK publication.

"Career Karma entered my life when I needed it most and quickly helped me match with a bootcamp. Two months after graduating, I found my dream job that aligned with my values and goals in life!"
Find Your Bootcamp Match