The jQuery toggle() method can be thought of as a lightswitch. When called, it toggles the selected elements “on” or “off.” That is, it toggles between rendering elements to the user or hiding them. In the following example, we will explore how to use toggle() to hide and display text when a button is clicked.
What Is jQuery toggle()?
The jQuery toggle() method displays or hides selected elements on a web page. Much like the word implies, this method works like a lightswitch to toggle the elements “on” or “off.” Typically the toggle() method is called with HTML buttons but can actually be called on any selected element.
In addition to toggling the display between “on” and “off,” jQuery toggle() accepts an argument for duration. The duration argument can either be a number or string data type. Supplying the duration argument will create an animation that lasts for the specified time.
jQuery toggle() also accepts a callback function to execute when the animation is complete. Remember, a callback function is a function that is passed to another function to be executed later. If no arguments are provided, toggle() will simply toggle the display “on” or “off.”
Let’s take a look at basic syntax and then dive deeper with example code. Our example code will cover animation toggling between a photo and text.
toggle() jQuery Syntax
As stated in our introduction, the jQuery toggle() method by default can be thought of as a lightswitch. Once clicked, it turns the selected element “on” or “off” in the display. Like any jQuery method, an element must be selected before toggle() is called.
Let’s look at an example using toggle() with no arguments. Beginning with our HTML file:
<button>
Click me
</button>
<p>
Read me!
</p>
<p id="hide" style="display: none">
NO! Read ME!
</p>
From here, we can see our HTML file is rendering a button and two paragraph tags. Notice the style attribute of the <p> tag with the id “hide.” Setting the display to none will hide that paragraph element from the display.

Our HTML file is rendering exactly as we predicted. Now let’s use jQuery toggle to show the hidden <p> tag. In this example, we will include our jQuery inside of the HTML file. In order to do this, we have to wrap our jQuery in a <script> tag:
<script>
$("button").click(function() {
  $("#hide").toggle();
})
</script>
As with all jQuery methods, we first have to select an element. Here, we’ve selected the button element and called the click() method. The click() method essentially attaches an event listener to the selected button. Once the button is clicked, it calls the callback function and executes our toggle() method. Read more about jQuery click() here.
Let’s take a look at our code in action.

Great! When we clicked the button, the hidden paragraph tag is displayed. Now that we are familiar with the syntax for toggle(), let’s look at an example using animation.
jQuery toggle() in Action
So far we’ve seen how toggle() can hide or expose selected elements in the display. Now, let’s take a look at an animation example that is slightly more complex. Don’t worry, we’ve discussed most of the concepts in the above section!
For our example, we are going to render a button, an image, and some text wrapped in a <p> tag. Our HTML file will look something like this:
<button>
Click me
</button>
<img id="cat" src="https://images.pexels.com/photos/2256259/pexels-photo-2256259.jpeg?auto=compress&cs=tinysrgb&dpr=1&w=500">
<p style="display: none">
Animation Complete
</p>
Notice again, our paragraph element will be hidden due to the value of the display attribute.
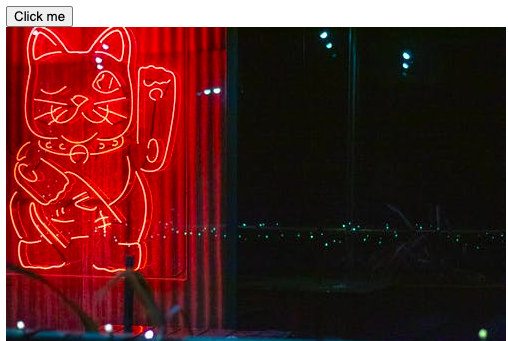
Our Lucky Kitty is rendering along with the button. Since our style attribute of the <p> tag is set to “display: none,” the text is hidden. Now, let’s try to slowly hide the photo and show the text when the button is clicked.
The argument for duration in jQuery toggle can either be a number or a string. If it is a number, that number represents milliseconds. For a string value, toggle() accepts “fast” or “slow,” which are 600 or 200 milliseconds, respectively.
For example, we wanted to slowly hide the photo, so we will use “slow” for our argument to toggle(). As with our first example, we will wrap our jQuery in a script tag at the bottom of the HTML file.
<script>
$('button').click(function() {
  $('#cat').toggle('slow', function() {
    $('p').toggle();
  })
})
</script>
After selecting the button and calling click(), our first callback function hides our cat photo. Passing the string “slow” to toggle(), we can then pass an additional callback function. This callback function executes after the 200 milliseconds have passed.
Once our “slow” time has expired, we will then toggle our paragraph element “on.” This will now show the <p> tag to the user.
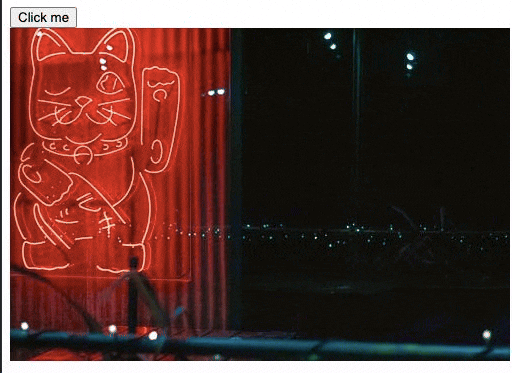
We can see through our handy gif that the image takes some time to hide and is immediately replaced with our text. By using a combination of uses for toggle(), we have created a dynamic animation with few lines of code.
Conclusion
We have discussed what jQuery toggle() is and what it does. Then we looked at syntax with some example code. Afterwards, we took what we’ve learned and combined it all to create a simple animation with an image.
Now that you’re familiar with jQuery toggle() you can start toggling elements in your next project. Or even add animations to images when a button is clicked. If you want to read further about jQuery toggle(), read the official documentation. Happy coding!
About us: Career Karma is a platform designed to help job seekers find, research, and connect with job training programs to advance their careers. Learn about the CK publication.