The jQuery on() method is a way to attach an event handler on an element. The element passed to the selector can be anything on the page. Most commonly, on() is a way to attach a click handler to a button. In practice, on() can attach any event handler to any selected element.
In this guide, we will cover the basic syntax for on() and see some practical examples in action. It is important to mention that jQuery on() accepts optional arguments that will not be covered here. We are going to stick to the required arguments and common usage. More about the optional arguments can be found here.
What is jQuery on()
The jQuery on() method provides a stable way to attach an event handler to a selected element. Once the handler is named, on() takes a callback function. A callback function is a function that is passed to a method that executes at a later time. For our purposes, the callback function is where something will happen.
Let’s say we used on() to attach a click event handler on a button. Our callback function is where we will define what action will happen after the button is clicked.
on() jQuery Syntax
Now that we have an idea of how on() works, let’s look at its specific syntax. Remember in all jQuery, we start with selecting our element. Then we call the on() method to attach our event handler. The first argument passed to on() is the event handler name itself, and is followed by the callback function.
$('.btn').on('click', function() {
  alert("You clicked the button!")
})
Here, we are selecting our button, calling on(), and passing our required arguments. Notice the event handler name must be in quotations. In our callback function, we are displaying an alert with a message. This lets us know the callback function is working properly.
More about jQuery alert() can be found here.
jQuery on() Example
Let’s expand on our above button example. We now know how basic syntax works for jQuery on(). For our example, let’s do something more than display an alert message after the button is clicked.
Instead of the alert message, we can display new content after the button is clicked. To do this, we will be using the jQuery append() method inside of our callback function. jQuery append() attaches content passed as an argument to the end of the selected element. Read more about jQuery append() here.
To begin, we are rendering an HTML button and a <div> where we will append new content.
<button class="btn">
Click me!
</button>

<div class="message">

</div>
This will render just the button for now.

There’s our button that wants to be clicked! Now, we select it with jQuery and have a message displayed after it is clicked.
$('.btn').on('click', function() {
  $('.message').append('The button has been clicked.')
})
Our button is selected by its class name and is passed a click event handler. In our callback function, we are appending a message to our <div> with a class name of “message.”
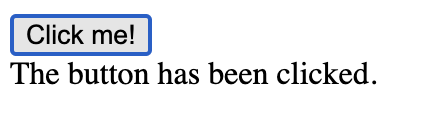
Our on() method works! One thing to note about using jQuery append() here is that our message will be attached to the bottom of our <div> every time the button is clicked. Let’s take a look at a different example.
In our next example, we will replace the button with new content after it has been clicked. This will mimic a more controlled user experience.
<div>
<button class="btn">
Click me!
</button>
</div>
Here, we have wrapped our button in a <div>. This will allow us to use jQuery html() and replace the button with a <p> tag containing text. Sometimes we only want users to click a button once and be directed to new content!
$('.btn').on('click', function() {
  $('div').html('<p>The button has been replaced</p>')
})
In a similar fashion as our previous example, we are selecting the button and using on() to attach a click handler. Inside our callback function, we are replacing the button HTML with a paragraph element containing new HTML content.
Once the button is clicked:

We have new content and no button! This is a robust way to guide the user experience in a more controlled way.
Conclusion
We have seen how jQuery on() can attach an event handler to an element in a few lines of robust code. After we learned the basic syntax, we looked at two examples of how jQuery on() can be used. It is flexible enough to be used in a specific way or in a more general way depending on the desired outcome.
As this guide has been an introduction to using jQuery on(), make sure to spend some time practicing. There are many uses waiting to be discovered as you progress toward event handler mastery!
About us: Career Karma is a platform designed to help job seekers find, research, and connect with job training programs to advance their careers. Learn about the CK publication.